

Understanding Your Vocal Frequency Foundation
Before you even think about touching a knob on the mixing board, let's focus on the absolute heart of any live show: the vocals. A stellar vocal mix isn't just about cranking up the volume; it's about creating a genuine, emotional bridge between the artist and every single person in the crowd. To build that bridge, you first need to understand the sonic DNA of the human voice. This is where we stop guessing and start listening with real purpose to learn how to eq live vocals.
The core notes a person sings, their fundamental frequencies, usually land somewhere between 85 Hz and 255 Hz. But the real magic—the character, the clarity, and the life of the vocal—exists far beyond this basic range. The true art of mixing vocals is understanding how all these frequencies play with the room, the other instruments, and the microphone itself.
The Anatomy of a Vocal Sound
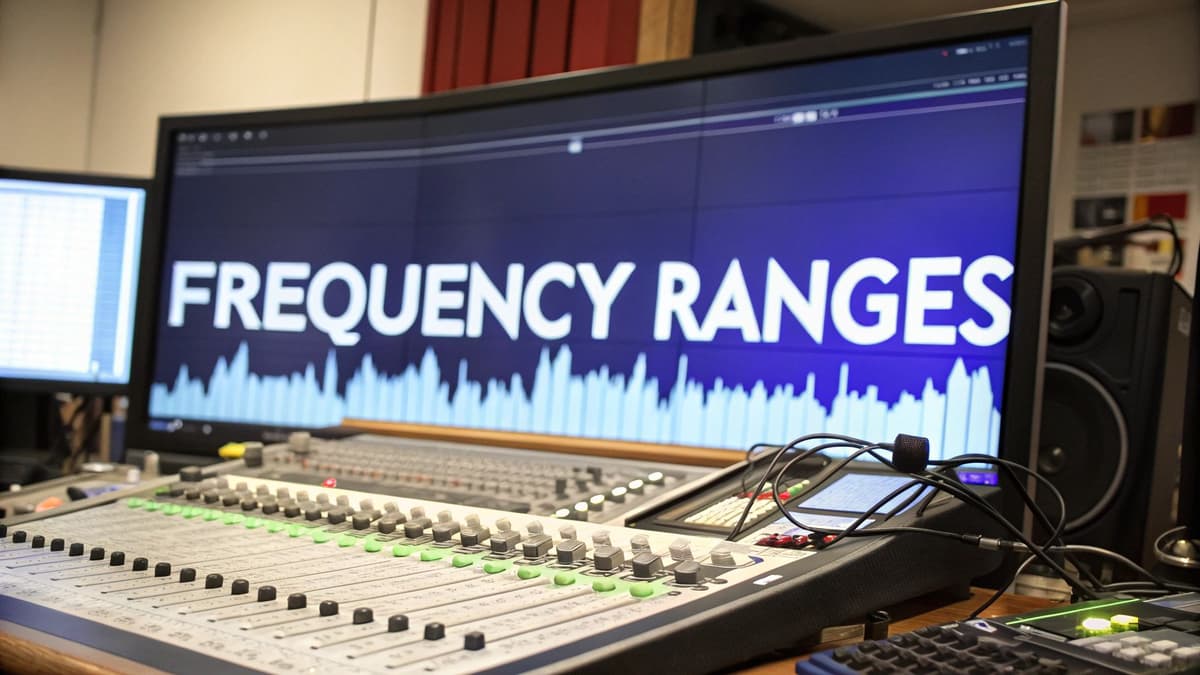
Don't think of a vocal as one single sound. Instead, picture it as a complex building made of different frequency layers, each with a specific job. To help visualize this, here's a chart that breaks down the audio frequency spectrum.
As you can see, the fundamentals give you the musical pitch, but the harmonics and sibilance buzzing in the higher frequencies are what provide the voice its unique texture and make the lyrics understandable. The secret to a fantastic vocal EQ is knowing which of these layers to boost and which ones to tame. Your choice of a live performance microphone is also a massive factor, as it determines how these frequencies are captured right from the source.
To get a more practical handle on this, let's break down the most important frequency ranges for vocals and what they do. This table will be your cheat sheet for making targeted, effective adjustments.
Essential Vocal Frequency Ranges and Their Functions
A comprehensive breakdown of vocal frequency ranges showing what each contributes to vocal sound and common EQ adjustments
| Frequency Range | Vocal Element | Typical Adjustment | Purpose |
|---|---|---|---|
| 80-120 Hz | Boom & Body | High-Pass Filter | Remove stage rumble and low-end noise that isn't part of the vocal. |
| 150-300 Hz | Warmth & Fullness | Gentle Boost/Cut | Add body to a thin voice or reduce "boominess" in a deep voice. |
| 300-500 Hz | Mud & Boxiness | Surgical Cut | Clean up a "cardboard" or cluttered sound that competes with other instruments. |
| 800 Hz - 1.5 kHz | Nasal Honk | Surgical Cut | Reduce an overly nasal or "telephone" quality in the vocal. |
| 2-5 kHz | Presence & Intelligibility | Gentle Boost | Help the vocal cut through a busy mix and improve lyric clarity. |
| 5-8 kHz | Sibilance ('S' sounds) | De-esser/Dynamic EQ Cut | Tame harsh "s" and "t" sounds without making the vocal dull. |
| 10-15 kHz | Air & Sparkle | Gentle Boost (Shelf) | Add a sense of space, breath, and high-end detail to the vocal. |
This table shows that EQ isn't about wild, sweeping changes. It's about precise, small moves in the right places. A small cut in the "mud" range can do more for clarity than a huge boost in the "presence" range.
Key Frequency Pockets to Know
Some frequency zones have a much bigger impact on your vocal mix than others. The 2-5 kHz region, for example, is where vocal presence and intelligibility live. A tiny boost here can make a singer's voice slice right through a thick wall of guitars and cymbals. On the flip side, the 300-500 Hz range is often a trouble spot, housing muddiness that can make a vocal sound congested and undefined.
Modern audio engineering practices, which have come a long way since their early days, often involve making surgical cuts in this muddy area to add clarity without thinning out the vocal. If you're curious, you can learn more about the fascinating history of audio equalization to see how these techniques have been refined over the decades. Knowing these critical zones is your first major step from just randomly twisting knobs to sculpting sound like a pro.
Choosing the Right EQ Tools for Live Performance
Once you have a solid handle on vocal frequencies, the next question is what tools to use. When you're trying to figure out how to EQ live vocals, the options can feel overwhelming, but the choice is actually simpler than you might think. For almost every live situation, a parametric EQ is your most powerful ally, offering a level of precision that a graphic EQ can't deliver.
A graphic EQ, with its bank of fixed-frequency sliders, is fine for broad adjustments, like tuning an entire room or shaping the sound of a monitor wedge. But when you need to pinpoint a specific harsh frequency in a singer's voice, you need the control of a parametric EQ. It lets you choose the exact frequency, adjust the bandwidth (the Q factor), and decide precisely how much to cut or boost. It's the difference between using a scalpel and a butter knife.
Parametric EQ: The Vocalist’s Best Friend
The Q factor is basically the focus of your adjustment. A wide Q affects a broad range of nearby frequencies, which is great for gentle, musical boosts to add warmth or body. On the other hand, a narrow Q allows you to surgically remove a single problem frequency—like that annoying feedback squeal or a nasal "honk"—without messing with the good stuff right next to it. This level of control is essential for professional-sounding vocals.
To get a better idea of how these controls work in tandem, this image of a parametric EQ curve is a perfect illustration.

You can clearly see how a parametric EQ can make a very narrow cut (on the left) to eliminate a problem, while also creating a wide, gentle boost (on the right) to enhance a good quality.
To help you decide which EQ might be right for your needs, here's a quick comparison of the most common types you'll encounter.
| EQ Type | Best For | Limitations | Price Range | Recommended Use |
|---|---|---|---|---|
| Parametric EQ | Surgical frequency adjustments, feedback notching, precise tonal shaping. | Can be complex for beginners; requires a good ear to use effectively. | Varies Widely (Built-in to most digital mixers) | Your go-to for individual channel EQ, especially vocals and problematic instruments. |
| Graphic EQ | Quick, broad adjustments for a whole mix, room tuning, and monitor shaping. | Fixed frequency bands; not precise enough for detailed vocal work. | $100 - $1,000+ | Best for your main FOH outputs or monitor sends, not individual channels. |
| Shelving EQ | Boosting or cutting all frequencies above or below a certain point. | Not selective; affects a very wide range of frequencies at once. | Varies (Often part of a parametric EQ) | Good for adding overall "air" (high shelf) or removing low-end rumble (low shelf/high-pass filter). |
| Dynamic EQ | Frequency adjustments that only activate when a signal crosses a threshold. | Can be processor-intensive and complex to set up correctly. | $200 - $1,500+ (Outboard/Plugin) | Taming harshness in a vocal that only appears when the singer gets loud. |
This table shows that while other EQs have their place, the parametric EQ offers the flexibility and precision needed for the detailed work of mixing live vocals.
Digital vs. Analog: What Really Matters?
The digital versus analog debate often boils down to workflow preferences and included features. Modern digital mixers from respected brands like Meyer Sound and d&b audiotechnik provide unbelievable flexibility. You get built-in parametric EQs on every single channel, the ability to save and recall presets, and instant visual feedback that makes troubleshooting much faster.
While some engineers swear by the "warmth" of analog consoles, the built-in channel EQ on a quality digital desk is more than capable for 99% of live vocal mixing. The truth is, the type of EQ you use is far more critical than whether you're turning a physical knob or a digital encoder. For most sound engineers, the channel strip EQ on their console is all they'll ever need. Before you think about spending money on outboard gear, make sure you’ve mastered the tools you already have.
Mastering High-Pass Filtering for Clean Vocals
This is where you really start to dial in a professional vocal sound: using a high-pass filter (HPF). It’s a foundational step, but one that’s often skipped, leaving the mix cluttered with low-frequency noise you don’t need. A well-placed HPF, sometimes called a low-cut filter, is probably your most powerful tool for sculpting a clean, defined vocal that has its own space in the mix.
The concept is straightforward. You're simply cutting all the frequencies below a specific point. This gets rid of all the junk that a sensitive microphone picks up—things like footsteps causing stage rumble, the hum from an air conditioner, or just general low-end mud that isn't part of the singer's voice. A great starting point is to set the HPF somewhere between 80 Hz and 100 Hz. But this isn't a "set it and forget it" situation. You have to listen closely and adjust for each vocalist. A male singer with a deep, booming voice might need a gentler touch, while a higher female voice can often handle a more aggressive filter.
Adjusting for Real-World Scenarios
The perfect HPF setting really depends on the live environment and the singer's mic technique. A huge factor is the proximity effect, which is the natural boost in bass frequencies that happens when a singer gets very close to the microphone. If you've got an energetic performer who practically swallows the mic, you’ll hear a boomy, muddy tone that completely smothers any vocal clarity. In a case like this, you’ll need to be much more assertive with your filter, possibly pushing it up to 120 Hz or even higher to fight that boominess.
This screenshot of a high-pass filter shows just how it works—aggressively slicing off frequencies below the cutoff point while leaving everything else alone.
The real takeaway here is that an HPF isn’t just a trim knob; it's a surgical tool. You're precisely removing the unwanted low-end rumble that clouds up your mix. The goal is always to cut out the problematic frequencies without making the singer's voice sound thin or robbing it of its natural warmth and body. Nailing this balance is a critical skill, and you can find more practical live sound advice by checking out our blog for other tips and tricks.
Making Vocals Cut Through Any Mix
After you've tamed the low-end rumble, it’s time for the fun part: making the singer’s voice soar over everything else in the mix. This is how you take the vocal track from being just another instrument to the undeniable star of the show. The key is to work with a frequency range that human hearing is naturally tuned into, making sure the lyrics aren't just audible, but clear and present.
The Magic of the Midrange
For vocal clarity and intelligibility, the sweet spot is the 2-5 kHz range. This is the sonic real estate of presence and definition. A gentle, broad boost here can make a vocal feel closer and more intimate, helping it cut through even a dense wall of electric guitars and cymbals. Think of it as a sonic spotlight; you’re not changing the singer, just drawing everyone’s attention to them.
Be careful, though, because a little goes a long way. If you get too aggressive, the vocal will start to sound thin, harsh, and even painful. I always start with a small boost of 2-3 dB and just listen to how it sits in the mix. A rock vocalist battling a loud band might need a bit more punch, while a folk singer with a more delicate delivery will need a much lighter touch. The goal is to make the vocal pop without sounding processed or unnatural. This kind of precise adjustment is exactly why getting comfortable with your console's EQ is so important before diving into more complex system-wide changes. If you want to explore that, our guide on how to tune a sound system is a great place to start.
Carving Out Space by Cutting Muddiness
Sometimes, making a vocal stand out isn't about boosting at all—it's about cutting. Before you even think about adding that presence boost, listen for any "muddiness" or "boxiness" in the low-mids. This is usually lurking around the 300-500 Hz area. It's a crowded neighborhood where the lower part of the vocal often fights for space with bass guitars, keyboards, and the body of acoustic guitars.
Making a precise, surgical cut in this range can instantly add clarity without thinning out the vocal. It’s like clearing away fog; suddenly, everything becomes sharper and more defined. This isn't just a personal preference; it's a common practice in live sound. In fact, data shows that around 65% of engineers regularly boost in the 2-5 kHz range while also using targeted cuts to clean up the mix. You can discover more about the history of EQ on vintageking.com.
Eliminating Harshness Without Killing Character
After you've boosted the presence range to help a vocal slice through the mix, you might run into a new, equally frustrating problem: harshness. This is that grating, almost painful quality that can make an otherwise fantastic vocal performance difficult to listen to. You’ll usually find this sonic pest hanging out in the 1-2 kHz range. It also has a close cousin called sibilance—those sharp, hissing ‘s’ and ‘t’ sounds that live a bit higher up, typically between 5-8 kHz. Knowing how to carefully remove these problems without gutting the vocal is a crucial skill for any live sound engineer.
The real challenge is that these problem spots are right next to the frequencies that give a vocal its unique texture and character. If you make a clumsy, wide cut here, you can accidentally make the singer sound like they have a bad cold or are performing from behind a heavy curtain. This is where precision is everything. Your best friend in this situation is a parametric EQ with a narrow Q setting, which lets you perform some real sonic surgery.
Taming Sibilance and Harsh Tones
Picture this: a singer is delivering a powerful performance, but every time they hit an 's' sound on a loud note, it's piercingly sharp. This is a perfect scenario for a narrow EQ cut. To find the offending frequency, start by 'sweeping' through the 5-8 kHz range with a boosted, narrow EQ band. Listen for the point where the sibilance really jumps out and becomes exaggerated. Once you’ve pinpointed it, simply flip that boost into a cut. A reduction of 3-6 dB is usually all it takes to tame the sharpness without making the vocal sound unnatural. The goal is to control the problem, not completely erase it.
This screenshot shows the waveform of a sibilant consonant, highlighting the high-frequency energy that creates that piercing sound.
Those intense, high-frequency spikes are exactly what you're trying to smooth out with your EQ. A precise cut in that specific area will round off those peaks, making the vocal much more pleasant for the audience.
For really persistent sibilance, you might want to reach for a more specialized tool. A dedicated de-esser or a dynamic EQ can be incredibly effective because they only reduce the problem frequency when it exceeds a certain volume threshold. These tools, which are standard in most modern digital consoles or available as plugins, give you amazing control. You can find consoles and outboard gear with these features on our community listings, and for more deep dives into advanced mixing techniques, be sure to check out our main blog page.
Winning the Feedback Battle with Strategic EQ
That high-pitched squeal of audio feedback is the quickest way to kill the vibe of a live show. Learning how to kill it quickly and precisely is a vital skill when you're figuring out how to eq live vocals. This isn't about panicking and yanking down the master fader; it's about making a surgical cut. Feedback erupts when a specific frequency, boosted by the PA system, finds its way back into the microphone, creating a vicious cycle. Your mission is to pinpoint that exact frequency and remove it without butchering the overall vocal sound.
Your best tool for this job is a parametric EQ. By using a very narrow Q factor, you can perform a deep cut on just the offending frequency, leaving the surrounding character of the vocal intact. This is far more precise than a graphic EQ, which would carve out a much wider chunk of the sound, taking good frequencies along with the bad.
How to Find and Fix Feedback Frequencies
So, how do you actually find that problem frequency in the wild? The classic "ringing out the room" method is your best friend during soundcheck. It’s a proactive way to find trouble before it finds you during the performance.
- Start by slowly raising the gain on the vocal microphone. Keep pushing it until you just begin to hear a single tone start to ring out. Be careful not to let it get screeching loud.
- Next, grab your parametric EQ and go on the hunt. Create a narrow-band boost and slowly sweep it across the frequency spectrum. When the ringing suddenly gets much louder, you've found your culprit.
- Now, simply flip that boost into a cut. A reduction of about 6-9 dB is typically all you need to tame it.
- Rinse and repeat this process. You'll likely find one or two other frequencies that are also prone to feeding back.
The fundamental idea here is that feedback is a physical phenomenon—a loop that you need to break at a very specific point in the frequency spectrum.
Real-World Feedback Scenarios
Remember that every room is different. A space with lots of glass and hard, reflective surfaces will generate different problem frequencies than a carpeted club with low ceilings. The performer's movement also plays a huge part. A singer who roams the stage can trigger new feedback points as they move closer to different speakers, like their floor monitors. If you need gear that offers this level of control, digital consoles and processors are the way to go. You can find a wide range on sites like Gearsupply.
By being methodical and precise with your EQ, you can dramatically increase your gain before feedback. This allows you to get the vocals sitting loud and proud in the mix without any distracting squeals. Getting this technique down builds a ton of confidence and is a clear sign you know what you're doing behind the board.
Your Complete Live Vocal EQ Roadmap
It's time to put everything together into a repeatable, systematic process you can bring to your next gig with confidence. Understanding how to EQ live vocals is one part of the puzzle; having a dependable workflow is what truly sets experienced pros apart from those just scrambling to fix problems as they pop up. This roadmap lays out a logical sequence that successful engineers follow, helping you build a fantastic vocal mix from the ground up while avoiding common pitfalls.
Building Your Mix with a Plan
Your first move should always be to build a solid foundation. Before you even think about boosting frequencies to add "sparkle" or "presence," you need to clean up the signal. This means starting with subtractive EQ—carving out problematic frequencies to create a clean slate. This is the bedrock of a clear and intelligible mix. A great workflow is to analyze, cut, and then boost.
This simple process flow chart shows the core steps to achieving a clean and powerful vocal mix.
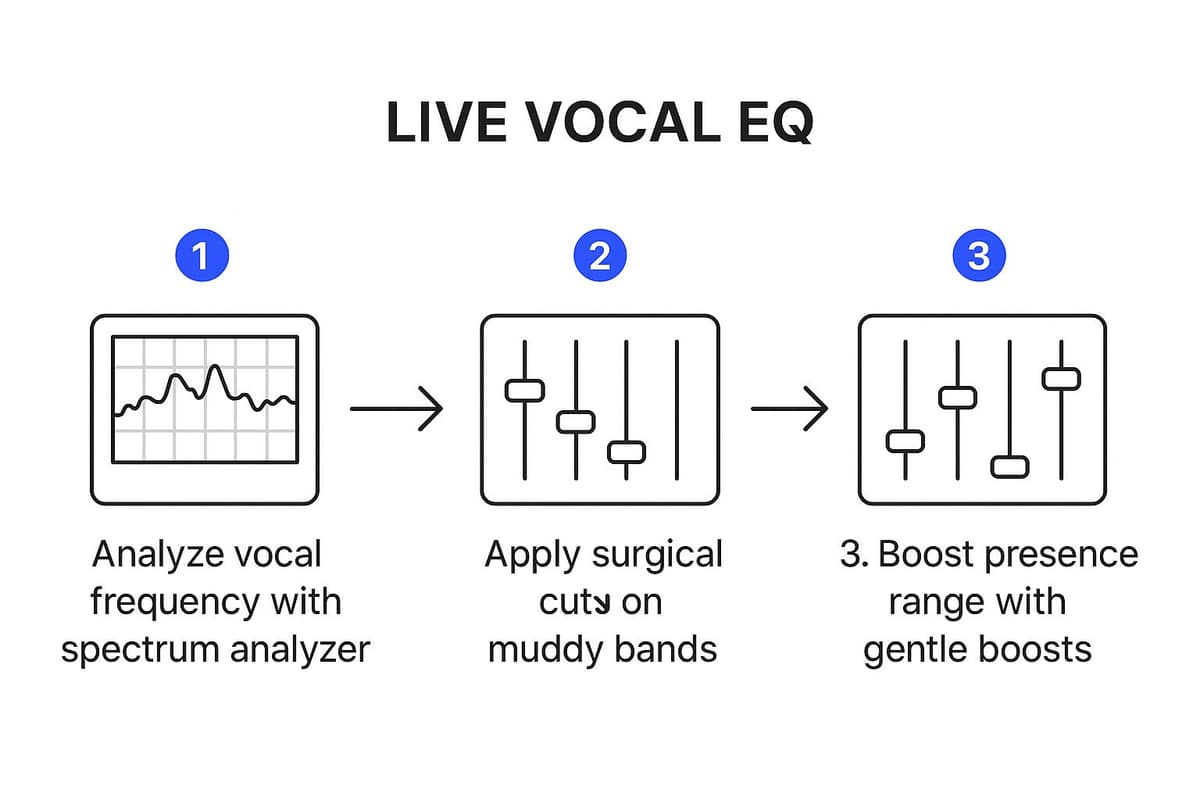
The key takeaway here is that boosting is the final touch, not the starting point. By first getting rid of any mud and then adding presence, you make sure the vocal has clarity and punch without sounding harsh or artificially hyped.
From Soundcheck to Showtime: A Practical Checklist
Think about your EQ process in a few distinct phases. During soundcheck, you have the luxury of time to be methodical. This is your chance to "ring out" the monitors, hunt down potential feedback frequencies, and set up a solid baseline EQ for each vocalist. A great soundcheck leads to a much less stressful show.
Here’s a practical checklist to walk you through a typical live scenario:
Initial Setup (Pre-Soundcheck):
- First thing, engage the high-pass filter (HPF) on the vocal channel. I usually start it around 100 Hz and then fine-tune it once the vocalist starts singing.
- Get your input gain set correctly. A strong, clean signal is non-negotiable.
During Soundcheck:
- Ask the vocalist to sing a dynamic part of a song, like a verse and a chorus. Listen closely for any obvious "muddiness" (usually around 300-500 Hz) or harsh, piercing tones (often in the 2-4 kHz range).
- Use a narrow Q to make surgical cuts and tame any problem frequencies you hear.
- After the vocal sounds clean, think about adding a gentle, broad boost in the presence range (3-5 kHz) to help it slice through the rest of the band.
During the Performance:
- Listen, don't just stare at the screen. Your ears should be your final guide, not the frequency analyzer.
- Make small, gradual changes. A tiny adjustment of 1-2 dB is often all that's needed.
- Pay close attention to how the vocal sits with the full band and the audience in the room. You'll likely need to make small tweaks as the room fills up with people, which changes the acoustics.
Following this roadmap will help you approach every live vocal mix with a clear plan and the confidence to execute it.
Ready to find the gear that will bring your live sound to the next level? Explore a huge selection of pre-owned professional consoles, microphones, and processors from top brands on the Gearsupply marketplace.


