
Decoding Pro Audio Systems: The Anatomy of Failure

Professional audio equipment is designed to withstand heavy use, unlike consumer-grade gear. However, even the most robust pro audio systems can experience failures. Understanding how these systems work, and why they sometimes don't, is the first step toward effective repair. This involves recognizing how different components interact and developing a systematic troubleshooting process.
Understanding Signal Flow and Component Interaction
A signal chain refers to the path an audio signal travels, from its source to the final output. A standard setup might include a microphone, a mixing console, a DSP, an amplifier, and finally, a loudspeaker. A problem in one component can sometimes create symptoms in another, which can be confusing for less experienced technicians.
It's essential to understand how each part of the signal chain interacts. For example, a faulty cable could easily be mistaken for a malfunctioning microphone or speaker. Proper diagnosis requires a comprehensive view of the entire system.
Environmental Factors and Failure Patterns
Environmental conditions can significantly impact the performance and lifespan of pro audio equipment. Extreme temperatures, high humidity, and unstable power are all potential culprits. Consistent monitoring and control of these factors are essential for preventing problems.
High temperatures can lead to overheating and component damage, particularly in amplifiers. Humidity can corrode connections and circuit boards in sensitive equipment. Power surges, on the other hand, can damage delicate electronics in any piece of equipment. Recognizing these environment-related failure patterns is a crucial skill for effective pro audio repair.
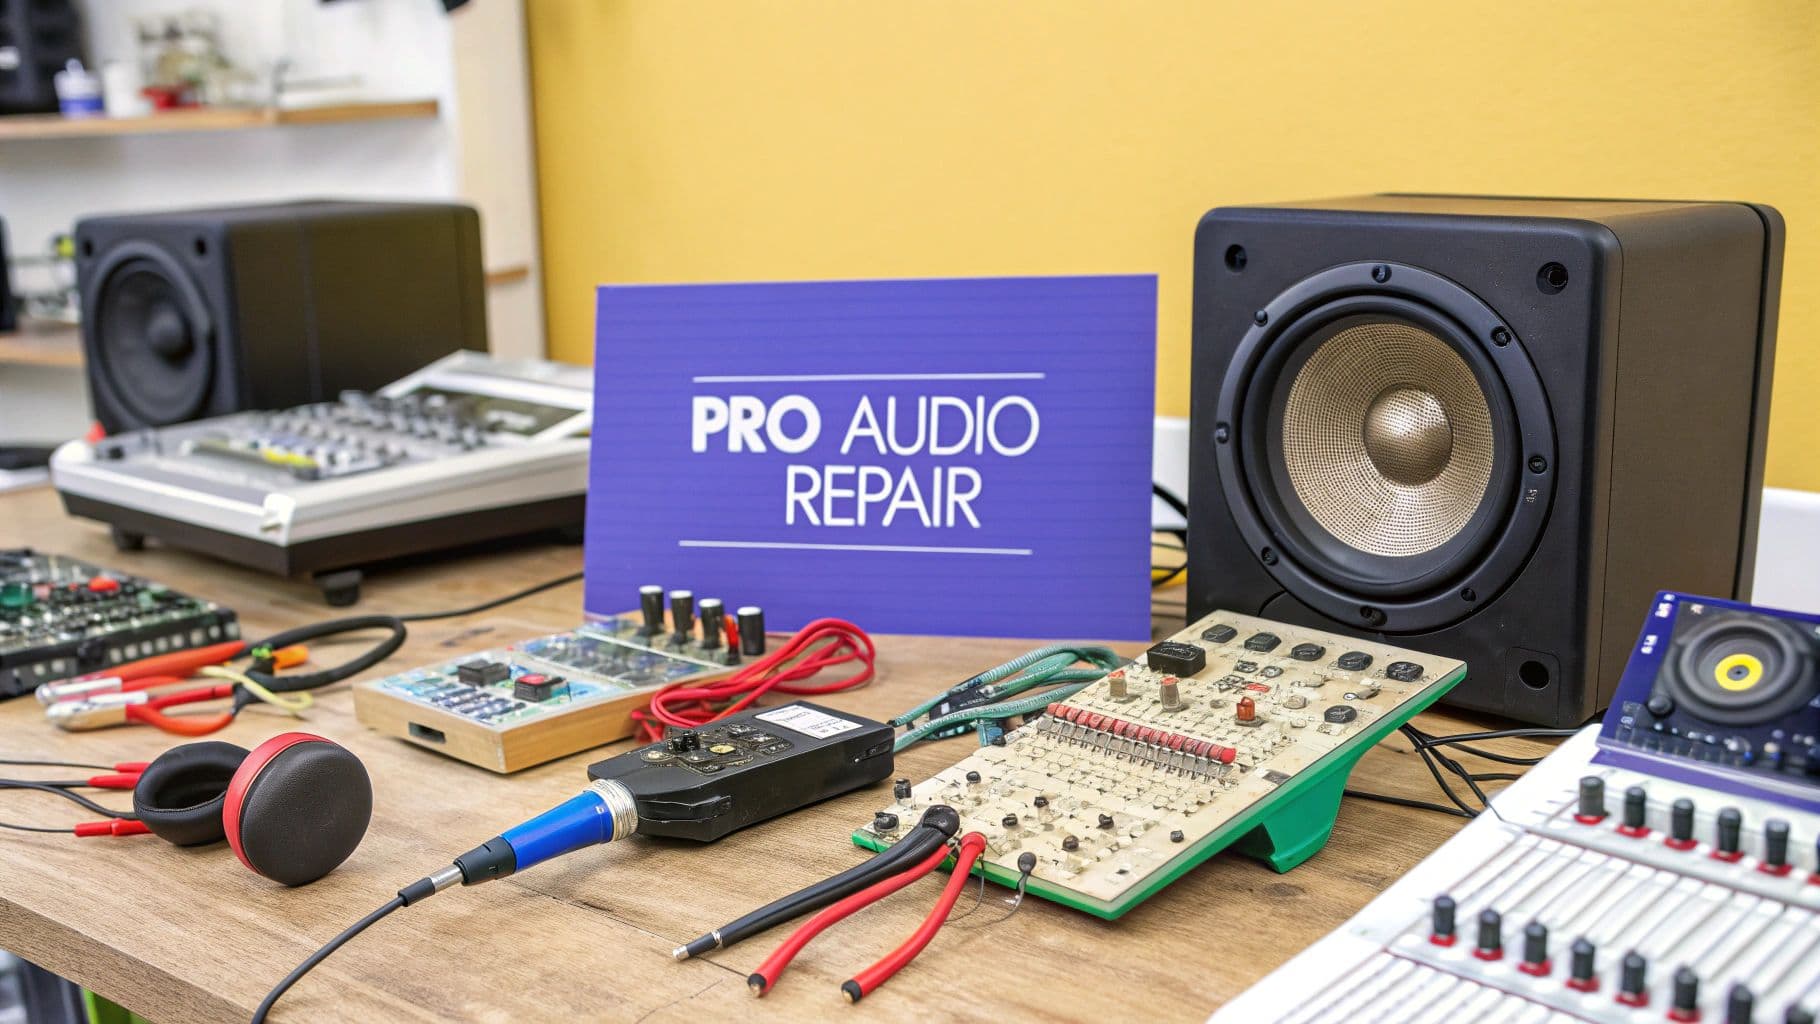
Essential Diagnostic Tools and Spare Parts
Having the right tools is vital for effective troubleshooting. A high-quality multi-meter is essential for checking voltages, resistance, and continuity. An oscilloscope allows you to visualize the audio signal, making it easier to spot distortions and other anomalies.
Keeping common spare parts readily available, such as fuses, cables, and potentiometers, can greatly reduce downtime. While these are the basics, more specialized tools, like speaker reconing kits, are needed for specific repairs.
Building a well-stocked toolbox and knowing how to use each tool effectively are key steps in becoming proficient in pro audio repair. For more in-depth information on building your toolkit, take a look at our blog resources. Interestingly, the growing demand for complex audio-visual systems has fueled significant growth in the repair industry. The global audio and visual equipment repair service market is expected to reach $5.8 billion by 2033, highlighting the increasing need for skilled pro audio repair technicians. You can find more detailed statistics here.
The Pro Audio Repair Arsenal: Tools That Make the Difference

Effective pro audio repair hinges on having the right tools. It's not about owning every gadget, but choosing tools that match the equipment you service. This allows for efficient diagnosis and repair. A live sound technician, for instance, will have different needs than a studio engineer working with mixing consoles.
Essential Tools For Every Pro Audio Technician
Some tools are fundamental to any pro audio repair kit. A high-quality digital multi-meter (DMM) is key for measuring voltage, current, resistance, and continuity. This helps pinpoint electrical faults and check component functionality. A reliable soldering station is also crucial for replacing faulty components and fixing connections. Invest in one with adjustable temperature control for precision. You might be interested in: How to find the best audio equipment deals.
A good set of hand tools is also indispensable. This includes screwdrivers (Phillips, flathead, and specialized security bits), pliers, wire strippers, and cutters. The correct tool prevents equipment damage and speeds up repairs.
Specialized Tools For Specific Repairs
Beyond the basics, specialized tools are invaluable. For loudspeaker repair, a speaker reconing kit helps replace damaged cones and voice coils. When working with mixing consoles, contact cleaner is essential for noisy potentiometers and faders, a common issue in older boards. Explore our blog for more information on these tools.
Diagnostic tools can greatly improve troubleshooting. An audio signal generator helps trace signal paths and identify faulty components. An oscilloscope lets you visualize the audio signal, revealing distortions and other anomalies.
Building Your Toolkit Strategically
Building a pro audio repair toolkit takes time and investment. Start with the essentials and gradually add specialized equipment as needed and as your budget allows. Prioritize tools for the equipment you work with most often. This maximizes your investment while ensuring you have the right tools.
The following table outlines a comparison of essential tools, categorized by their application and required skill level. This will assist in strategically building your toolkit based on your specific repair focus.
Essential Pro Audio Repair Tools Comparison
This table compares different categories of tools needed for professional audio repair, from basic to advanced, with price ranges and usage scenarios.
Tool Category | Essential Tools | Price Range | Application | Skill Level Required |
|---|---|---|---|---|
Basic Electronics | Digital Multi-Meter (DMM), Soldering Station, Hand Tools (Screwdrivers, Pliers, Wire Strippers) | $50 - $500 | General electronics testing, component replacement, assembly/disassembly | Beginner - Intermediate |
Loudspeaker Repair | Speaker Reconing Kit, Adhesive, Dust Cap | $30 - $150 | Repairing damaged speaker cones, voice coils, and dust caps | Intermediate |
Mixing Console Repair | Contact Cleaner, Compressed Air, Specialized Cleaning Tools | $20 - $100 | Cleaning potentiometers, faders, and internal components | Beginner - Intermediate |
Advanced Diagnostics | Audio Signal Generator, Oscilloscope | $200 - $2000+ | Signal path tracing, waveform analysis, identifying complex circuit issues | Advanced |
As shown in the table, starting with basic electronics tools is essential for any pro audio repair technician. From there, specializing in areas like loudspeaker or mixing console repair requires specific tools. Advanced diagnostics tools like oscilloscopes require a higher skill level and investment.
Interestingly, the pro audio repair field's demand and compensation vary by location. In 2022, the New York metro area employed about 1,640 professionals with an annual mean wage of $60,960. Denver reported higher average earnings despite fewer professionals. Find more detailed statistics here. Location can impact a pro audio repair career. As your experience grows, expand your tools to handle more complex repairs and a wider range of equipment. Check out our amplifiers page to see the variety of products used in the field.
The Diagnostic Detective: Systematic Troubleshooting That Works

Effective pro audio repair hinges on a systematic approach, not mere guesswork. This methodical process helps pinpoint the root cause of any audio issue, saving valuable time and preventing potential headaches. This structured methodology is what distinguishes seasoned technicians from amateurs, and it all starts with careful observation.
Gathering Symptoms and Isolating Variables
The first step in troubleshooting is gathering information. What exactly is malfunctioning? Is the sound distorted, intermittent, or completely absent? When does the problem occur? Documenting the symptoms helps form a hypothesis about the source of the issue.
Next, isolate the variables. This might involve testing individual components of your signal chain. For example, if you suspect a faulty microphone, try substituting it with a known working one. This process of elimination narrows down the possibilities.
Hypothesis Testing and Verification
Once you have a potential culprit, it's time to test your hypothesis. This could involve using specialized diagnostic tools. A digital multi-meter (DMM), for instance, can check for continuity, while an oscilloscope allows visualization of the audio signal to identify anomalies. If your tests confirm your hypothesis, you've identified the problem.
Verification is the final, crucial step. After the repair, thoroughly test the equipment to ensure the issue is fully resolved and no new problems were introduced. This confirms the effectiveness of the repair.
Tackling Intermittent Issues and Safety Protocols
Intermittent issues are the most challenging to diagnose in pro audio repair. They often require patience and persistence to reproduce the problem consistently. This might involve physically interacting with components, such as tapping them or flexing cables.
Safety is paramount when working with pro audio equipment. Always disconnect the power before working on any device, especially amplifiers and power supplies containing high-voltage circuits. Be mindful of hot soldering irons and other potential hazards.
Essential Tools and Spare Parts
Having the right tools is essential for effective pro audio repair. A DMM is a cornerstone for checking various electrical aspects. An oscilloscope is invaluable for visualizing the audio signal.
Maintaining a supply of common spare parts like fuses, cables, and potentiometers can significantly expedite repairs. Having these on hand prevents delays. More specialized parts can be stocked based on the equipment you service most often. Explore our community listings for insights into commonly needed spare parts.
The pro audio market is experiencing significant growth, projected to reach $37.8 billion by 2033. This indicates a rising demand for pro audio equipment and, consequently, for skilled technicians. Learn more about this market growth. By adopting systematic troubleshooting and stocking the necessary tools and spares, you can significantly enhance your repair capabilities.
Component-Specific Repair: From Speakers to Signal Processing

This infographic shows how time breaks down in pro audio repair. A significant 50% goes to soldering and component replacement. Diagnostics takes up 30%, while final testing accounts for 20%. Accurate diagnosis is clearly key to efficient repairs, minimizing wasted time on incorrect component replacements. This interconnectedness between diagnosing, repairing, and testing is crucial for successful outcomes.
Loudspeaker Repair: Cones, Coils, and Crossovers
Loudspeakers frequently suffer from physical damage and general wear and tear. The initial step involves determining the source of the problem: a torn cone, a damaged voice coil, or a faulty crossover network. Reconing a speaker cone utilizes specialized kits and adhesives. Meanwhile, replacing a voice coil requires precise soldering skills. Crossover repair involves testing passive components like capacitors, inductors, and resistors, often leading to replacements to restore the speaker's original frequency response. For more information on microphones used in live sound, check out this article: Learn more in our article about live performance microphones.
Amplifier Repair: Power, Output, and Thermal Management
Amplifier repair often centers around power supply problems, output stage malfunctions, and thermal management issues. A robust troubleshooting process is essential for effective pro audio repair. Refgrow offers a helpful guide on general software troubleshooting. Testing transistors and other components requires specialized tools like a multimeter and an oscilloscope. Thermal issues often require replacing thermal paste or upgrading cooling systems to avoid future problems.
Mixing Console Repair: Faders, Potentiometers, and Circuit Boards
Mixing consoles offer unique repair challenges. Dirty potentiometers (pots) are a common cause of crackling and signal loss. Specialized tools and techniques are necessary for cleaning and replacing faders. Repairing circuit boards involves tracing signal paths and identifying faulty components, which may demand advanced soldering skills.
Microphone Repair: Capsules, Cables, and Phantom Power
Microphone repair spans from straightforward cable replacements to intricate capsule repairs. Troubleshooting phantom power circuits necessitates caution and a solid understanding of electronics. Capsule replacement often requires careful soldering and delicate handling of components. Browse our microphones page for a selection commonly used in pro audio.
DSP and Signal Processor Repair: Firmware and Conversion Issues
Digital Signal Processors (DSPs) present complex repair scenarios. Updating firmware and resolving software issues can be challenging. Problems with analog-to-digital and digital-to-analog converters necessitate specialized test equipment and knowledge of digital audio principles. This often makes DSP repair the most complicated aspect of pro audio work.
Repair vs. Replacement: A Balancing Act
Choosing between repairing and replacing equipment is a crucial decision. Factors to weigh include the cost of repair, parts availability (especially for vintage gear), the equipment's age and condition, and the availability of comparable new equipment. Our brands page provides details on specific manufacturer product lines and repairability. Sometimes, the sentimental value of vintage gear justifies the repair cost, while in other cases, replacing with newer technology is more practical.
To further illustrate common issues and their solutions, the table below provides a helpful overview:
Common Failures and Solutions by Equipment Type
This table outlines the most frequent problems encountered with different types of pro audio equipment and their corresponding repair approaches
Equipment Type | Common Failure | Diagnostic Signs | Repair Approach | Estimated Repair Complexity |
|---|---|---|---|---|
Loudspeaker | Torn Cone | Distorted sound, buzzing | Reconing or replacement | Moderate |
Loudspeaker | Damaged Voice Coil | No sound, or intermittent sound | Voice coil replacement | Moderate to High |
Amplifier | Power Supply Issue | No power, or intermittent power | Capacitor replacement, voltage regulator repair | Moderate |
Amplifier | Output Stage Malfunction | Distorted output, low output | Transistor replacement, bias adjustment | High |
Mixing Console | Dirty Potentiometer | Crackling sound, intermittent signal | Potentiometer cleaning or replacement | Low to Moderate |
Microphone | Cable Failure | Intermittent signal, no signal | Cable replacement | Low |
DSP | Firmware Issue | Unexpected behavior, crashes | Firmware update | Low to High |
This table highlights the range of complexities in pro audio repair, from simple cable replacements to intricate board-level repairs. Understanding these common failures and their solutions is crucial for efficient troubleshooting and repair.
Preventative Maintenance: Stop Problems Before They Start
<iframe width="315" height="560"
src="https://www.youtube.com/embed/TvjIBuVZipw"
title="YouTube video player"
frameborder="0"
allow="accelerometer; autoplay; clipboard-write; encrypted-media; gyroscope; picture-in-picture; web-share"
allowfullscreen></iframe>
The best pro audio repair is the one you never need. Preventative maintenance is the key to keeping your professional audio equipment in top shape and performing at its peak. This proactive approach saves you time, money, and the stress of unexpected equipment failures during critical moments. It ensures your loudspeakers, amplifiers, mixing consoles, microphones, DSPs, and your entire signal chain are always ready to go.
Cleaning and Environmental Control
Regular cleaning is essential for your pro audio equipment. Dust and debris build-up in sensitive areas, creating problems in faders, potentiometers, and connectors. Use the right cleaning solutions and tools for each piece of equipment. Compressed air is great for removing dust from hard-to-reach areas, while contact cleaner can revive noisy pots and faders.
Maintaining a stable environment for your equipment is just as important as cleaning. Extreme temperatures and humidity can drastically shorten the lifespan of your gear. Keep a consistent temperature and humidity level in your studio or performance venue. Also, protect your equipment from direct sunlight and other harsh environmental factors.
Spare Parts Inventory and Emergency Kits
Having a well-stocked spare parts inventory is essential for quick repairs. Keep common replacement parts like fuses, cables, and connectors on hand. Having these readily available minimizes downtime when problems arise. This is similar to keeping common tools like screwdrivers and pliers readily available. For touring professionals, a dedicated emergency kit tailored to your specific setup is a must-have.
When building your spare parts inventory, think about the likelihood of failure and the importance of each component. Focus on essential items prone to failure or those that would significantly impact a performance if they malfunctioned.
Recognizing Early Warning Signs
Learning to spot the early signs of a failing component is a critical skill. Unusual noises, intermittent issues, and changes in performance can indicate something is wrong. Addressing these issues immediately prevents them from becoming bigger problems. A slight crackling in a loudspeaker or a drop in amplifier output, for example, should be investigated right away.
Pay close attention to heat. Excessive heat is a common precursor to component failure. Regularly check the temperature of your equipment, especially amplifiers, and ensure they have proper ventilation. You might also find our guide on rigging inspection helpful. By addressing these warning signs quickly, you can prevent major problems later on.
Regular Inspections and Scheduled Maintenance
Regularly inspect your equipment, both visually and functionally. Check cables for damage, clean connectors, and test all functions. Set up a schedule for more in-depth maintenance, including cleaning internal components and calibrating devices. Consider using the specialized cleaning tools and techniques mentioned earlier. This regular attention to detail can dramatically extend the life of your pro audio equipment. For more information on maintaining specific gear types, visit our categories page.
Pro Audio Repair Boundaries: DIY vs. Professional Intervention
Knowing when to tackle a pro audio repair yourself and when to call in a professional is crucial. This decision affects both your equipment's lifespan and your budget. This guide provides a framework for making smart choices about pro audio repair, from simple troubleshooting to complex component-level fixes.
Assessing Your Skills and the Repair Complexity
Before attempting any repair, honestly evaluate your technical abilities. Are you comfortable using a soldering iron? Do you understand basic electronics? If not, even seemingly minor repairs can lead to more damage.
Next, consider the repair's complexity. Replacing a cable is completely different from repairing a circuit board. Tasks like cleaning faders on a mixing console or replacing a microphone cable are generally DIY-friendly. However, internal repairs on amplifiers, DSPs, or speaker crossovers often require specialized tools and expertise. You might be interested in: How to buy used audio equipment.
Equipment Value and Warranty Implications
The value of your equipment is another key factor. For inexpensive gear, professional repair costs might exceed the replacement cost. For high-end equipment, professional repair is almost always the better choice.
Check your warranty before any DIY repairs. Opening the equipment casing could void it. If you're unsure, contact the manufacturer or a qualified technician. This is especially important for newer or expensive equipment.
Warning Signs: When to Call a Professional
Certain warning signs indicate a repair is beyond DIY. If you encounter burnt components, melted wires, or a strong burning smell, stop immediately and consult a professional. These indicate serious problems that could be dangerous to handle without proper training.
Similarly, if you've exhausted your troubleshooting steps and can't identify the problem, it's time for professional help. Continuing without a clear understanding can do more harm than good. Regular maintenance is important; explore general repair and maintenance resources for guidance.
Finding Qualified Technicians and Documentation
When you need professional help, finding a qualified technician is essential. Look for technicians with experience on your specific type of equipment. Ask about their certifications and experience. A good technician will gladly discuss their qualifications and repair approach.
Before sending your gear for service, thoroughly document its condition. Take pictures and videos, and note any existing problems. This protects you and the repair shop, ensuring your equipment is returned in the same or better condition.
Cost and Timeline Expectations
Get a clear repair cost estimate upfront and anticipate potential delays. Parts availability, especially for older equipment, can significantly affect repair time. Discuss a realistic timeline with the technician and consider potential contingencies.
Browse our extensive selection of pro audio equipment at Gearsupply to find everything you need for your next project.


